
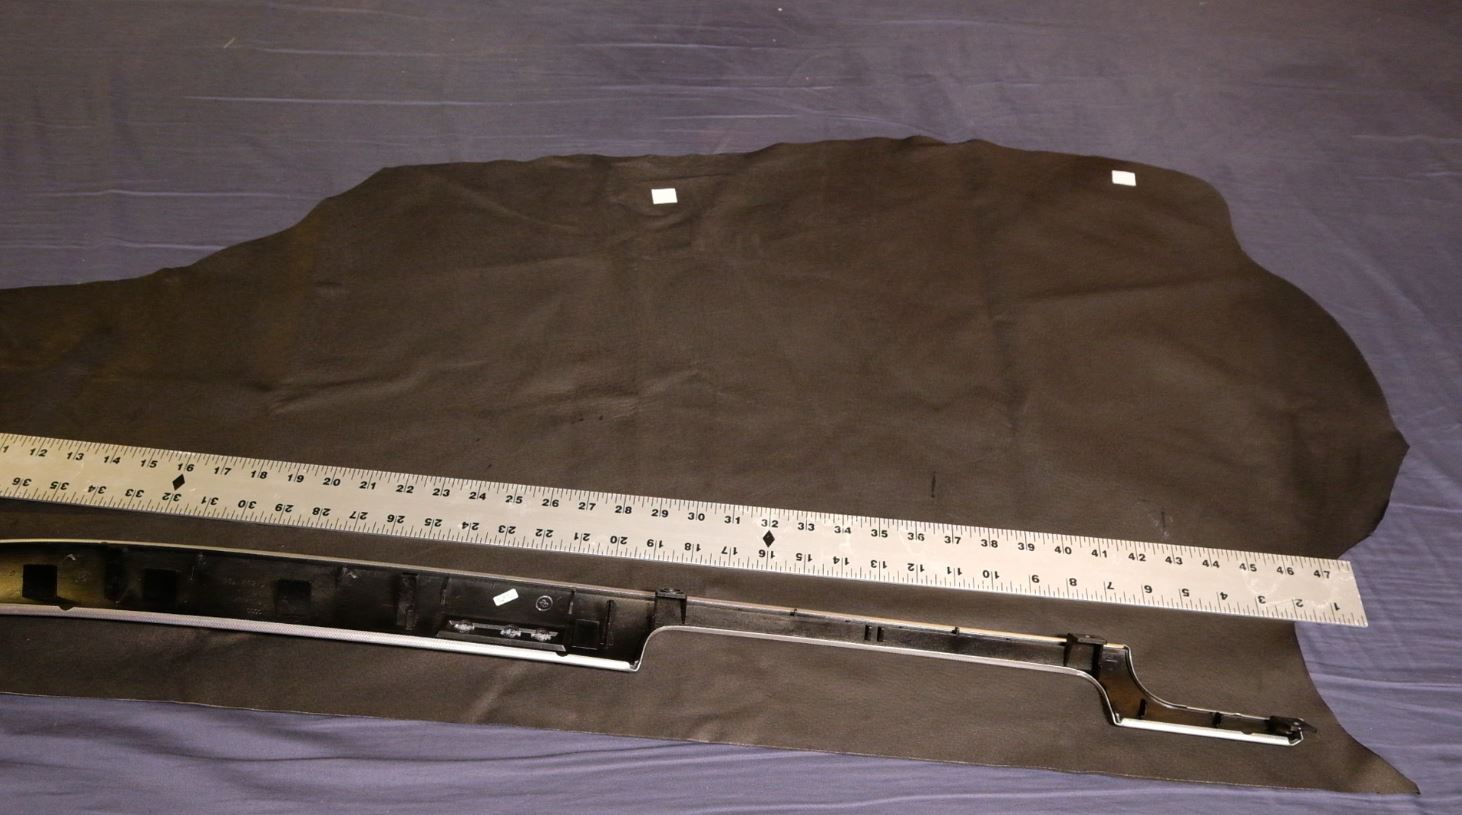
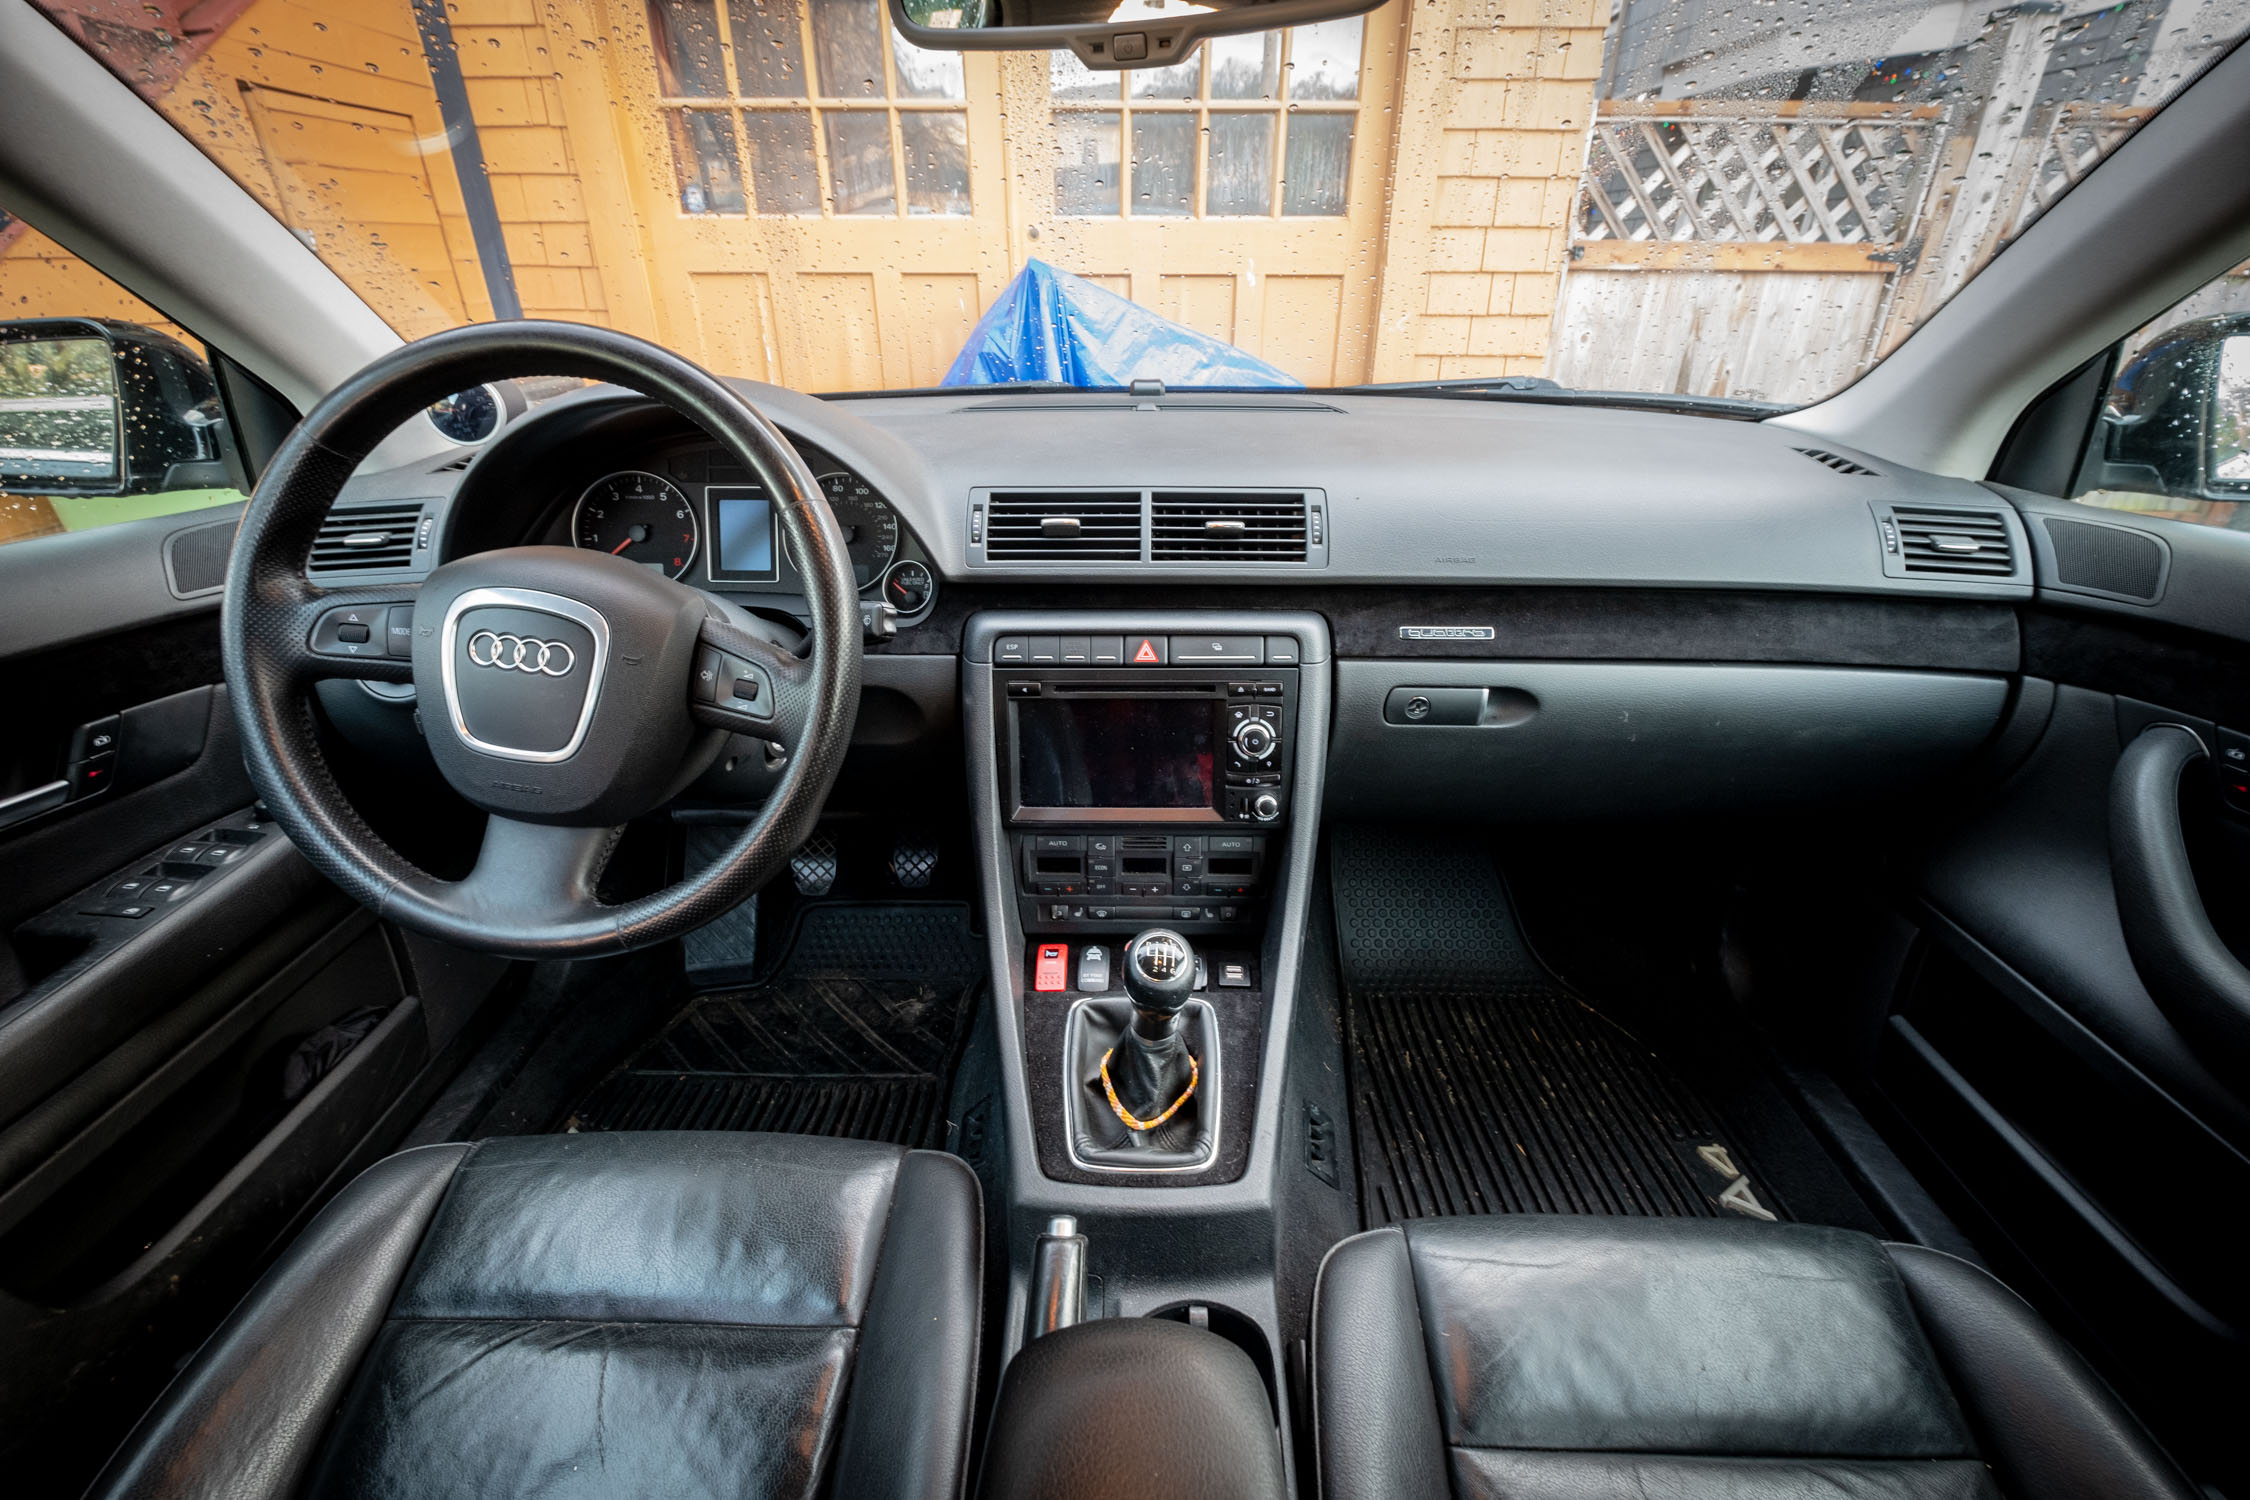
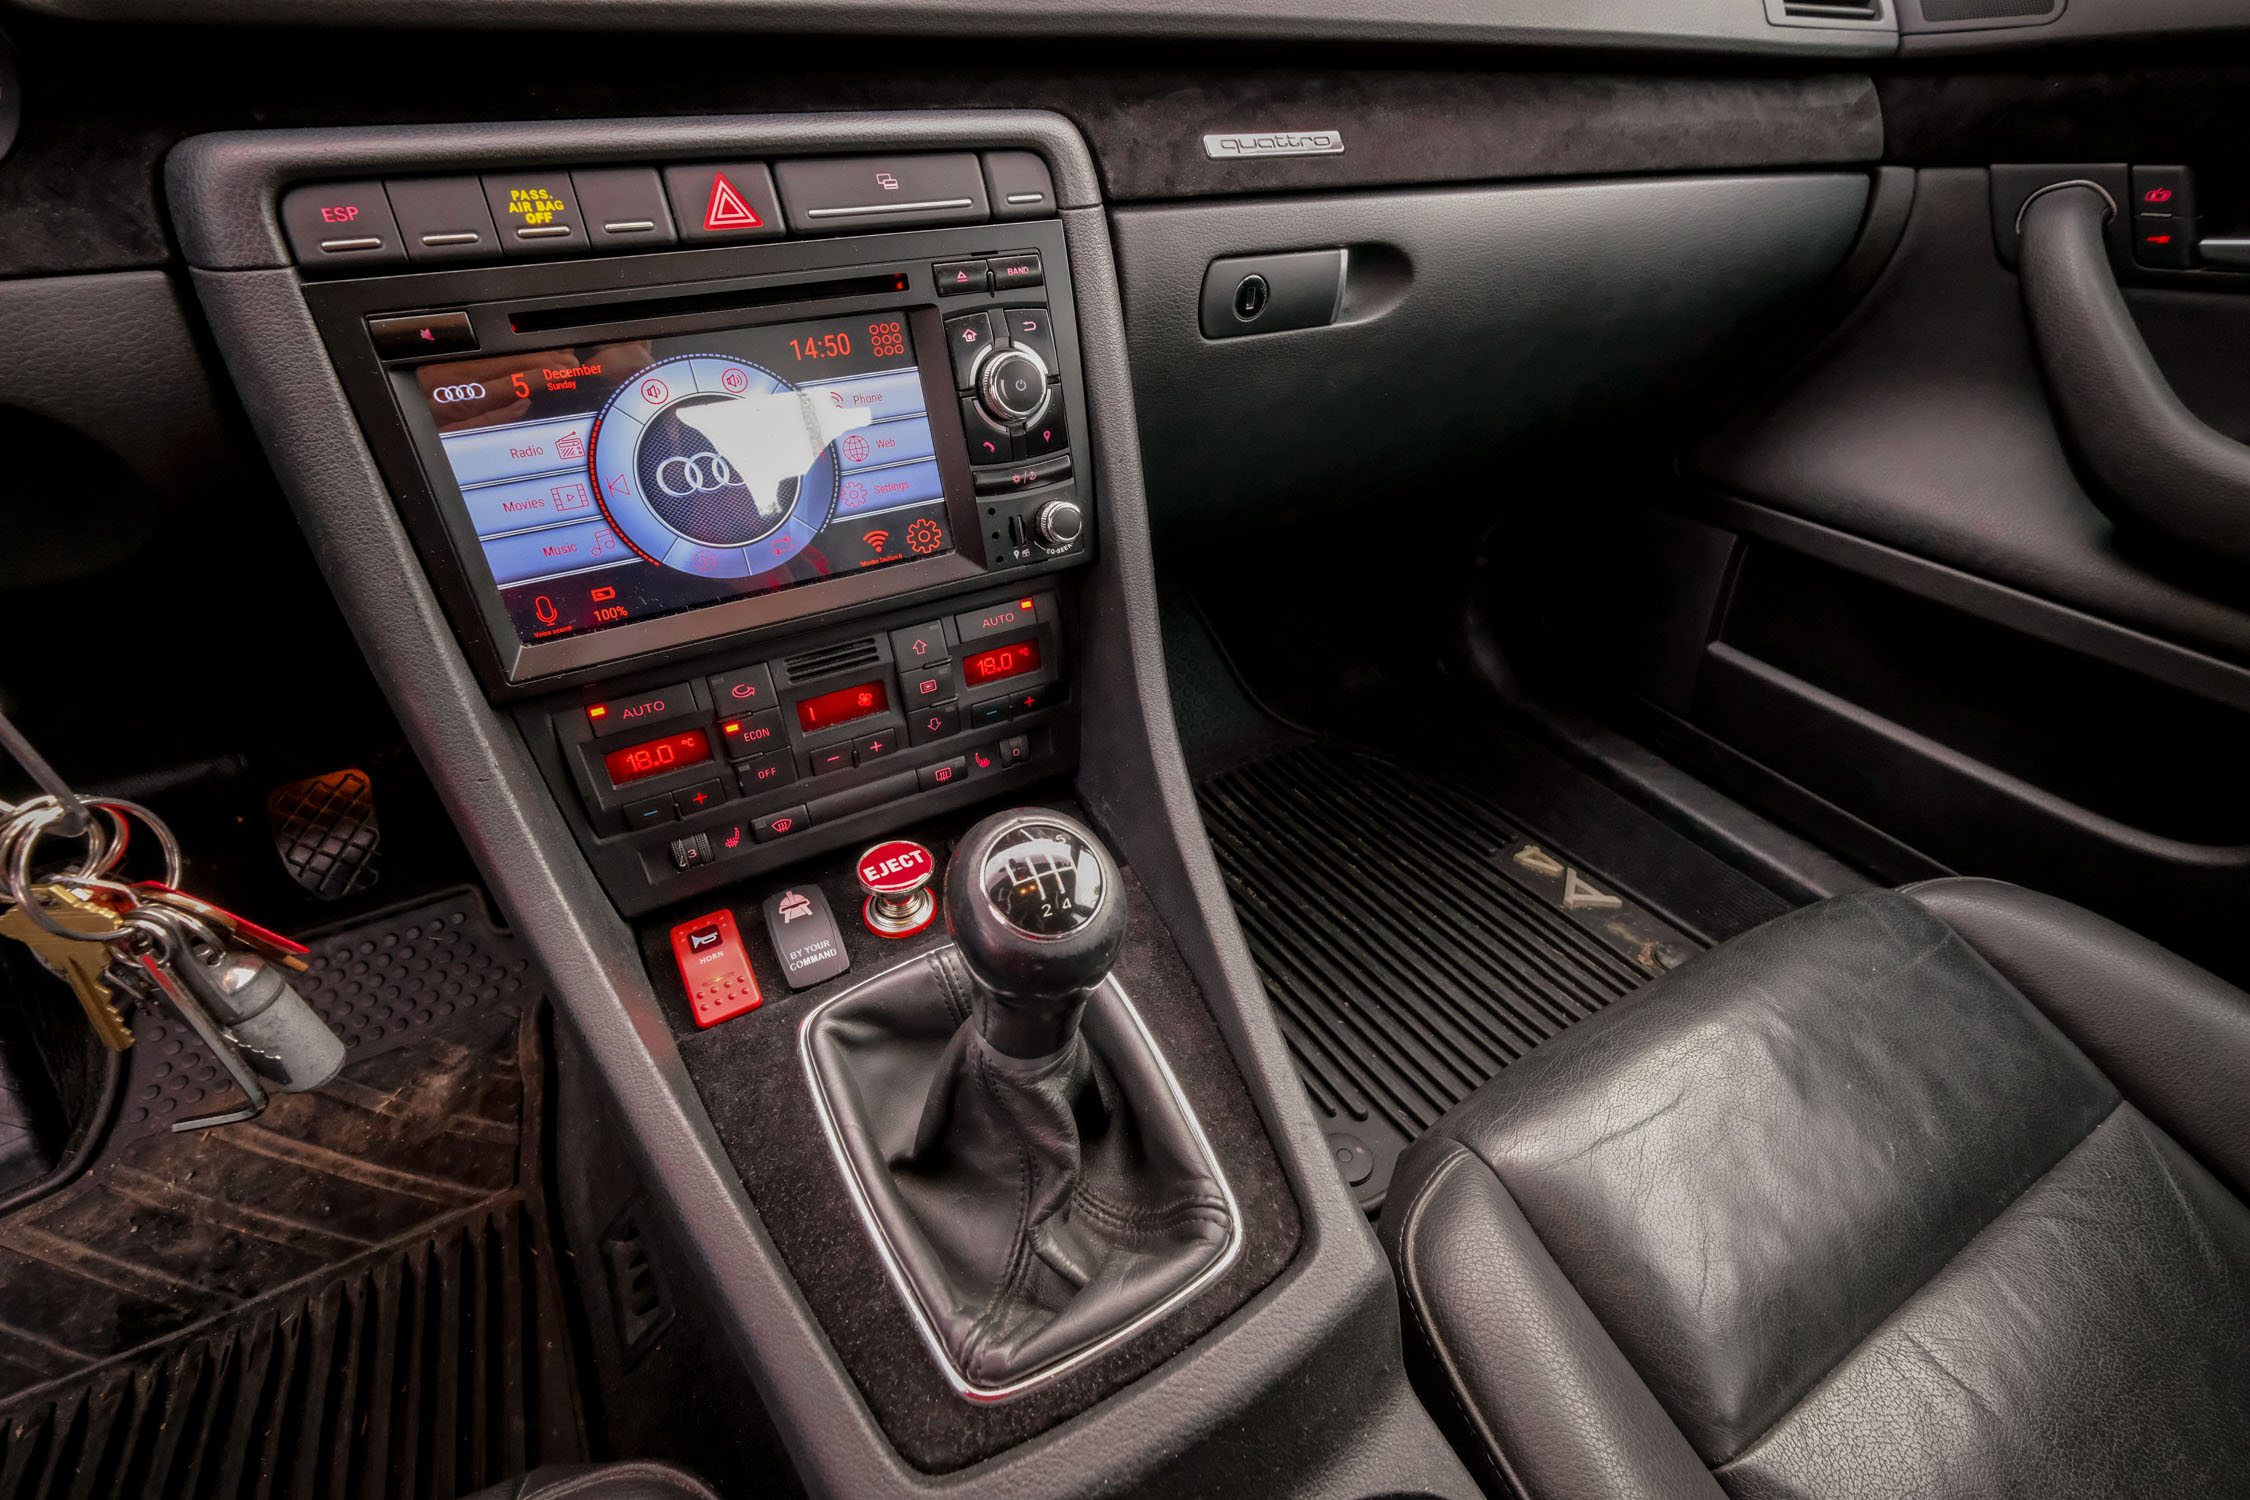
When I bought my car used in 2010 it came with the default “Fish Scale” aluminum interior trim. This came with a few different trim types. Piano Black, Carbon Fibre, Wood Grain, and Brushed Aluminum are a few of them. I didn’t mind the look of the Fish Scale trim but over time it has not aged well. Its pretty common for this trim to get pock marks, scratches and other damage that reduces the quality of the trim. I wanted to change things up and I chose to do a suede wrap.
Choosing the material
For a long time I’ve wanted to do something to make it look better. The easiest approach is to wrap it with vinyl. The majority of vinyl wraps I have seen have used a carbon fibre pattern. I’m not a big fan of having carbon fibre simply for the looks of it. I think carbon fibre is way overused, especially on interior components for simply the cosmetics.
Another reason I wanted to avoid using a vinyl wrap is that the fish scale aluminum has a texture to it. I didn’t that texture to come through the wrap over time.
I didn’t want to use any of the differently styled stock trim. Instead I wanted to have something unique. That’s what led me to thinking about using suede. My first idea was to use a red or burgundy suede to match the interior console lighting. The more I thought of that the more I thought it would not look very good. Unless I was also going to match the seats the red would look out of place. Eventually I decided on black
I also considered using Alcantara instead of suede. Upon looking at different samples of Alcantara I found that the fabric backing has no stretch or give to it. The trim pieces have complex curves and I felt the Alcantara would be really difficult to shape around those curves. Suede naturally has some stretch to it so in the end that’s what I went with.
I got my suede from Lonsdale Leather (Not sponsored) in Vancouver, BC. They gave great per-purchase support over email, even sent me photos of the suede. The cost including shipping was around $75. I don’t remember the exact amount.
Materials needed
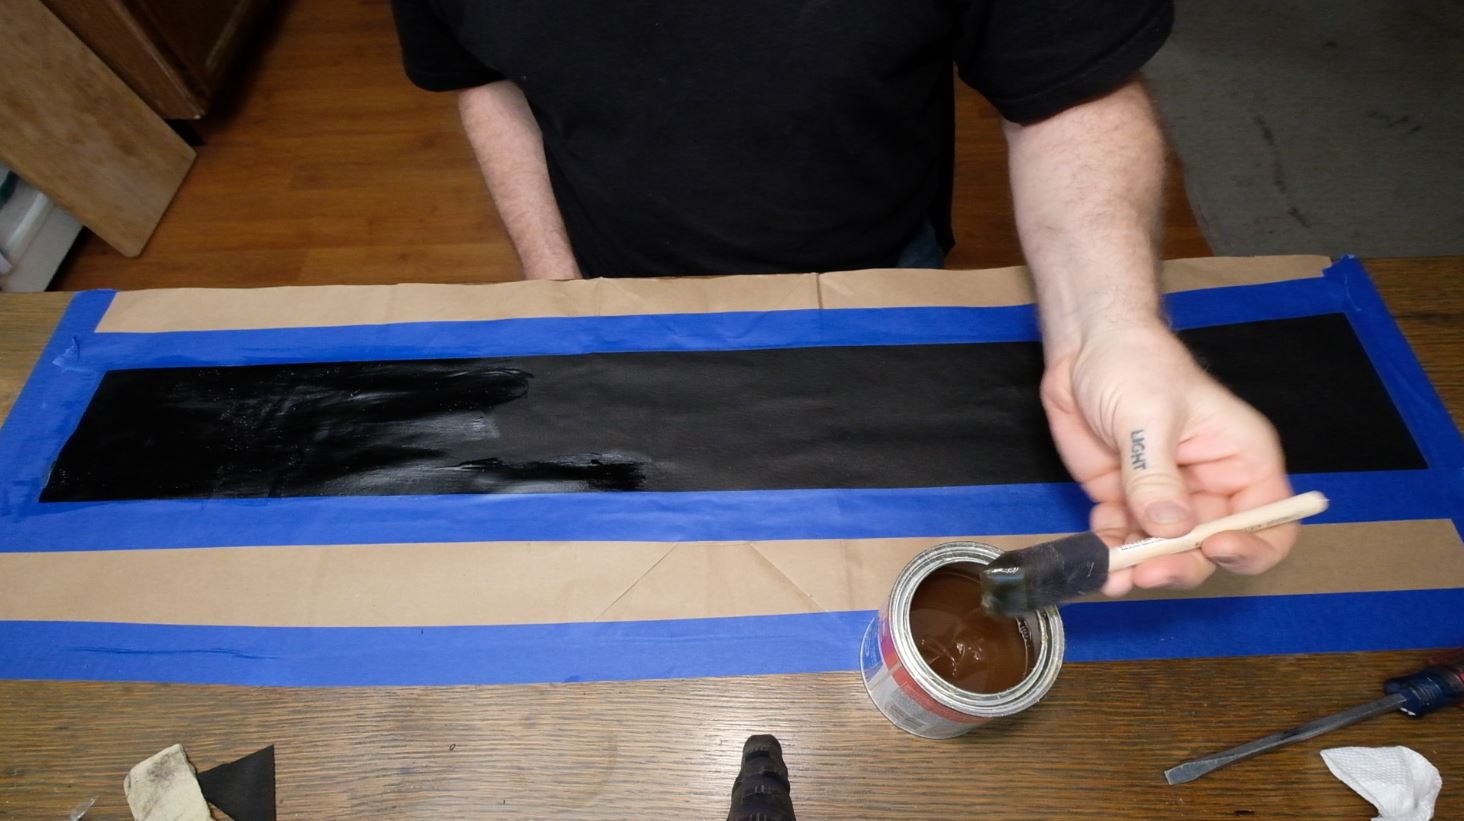
Besides the suede I bought some Heavy Duty contact cement. I researched the different 3M spray adhesives, watching a lot of videos and reading a lot of reviews. My takeaway was that they are messy to use and over time the material can separate from the backing.
I also used
- Razor knife with fresh blades
- A sharp pair of scissors
- Large ruler
- Masking tape
- Paper shopping bags, but newspaper would work too.
- 100 grit sand paper
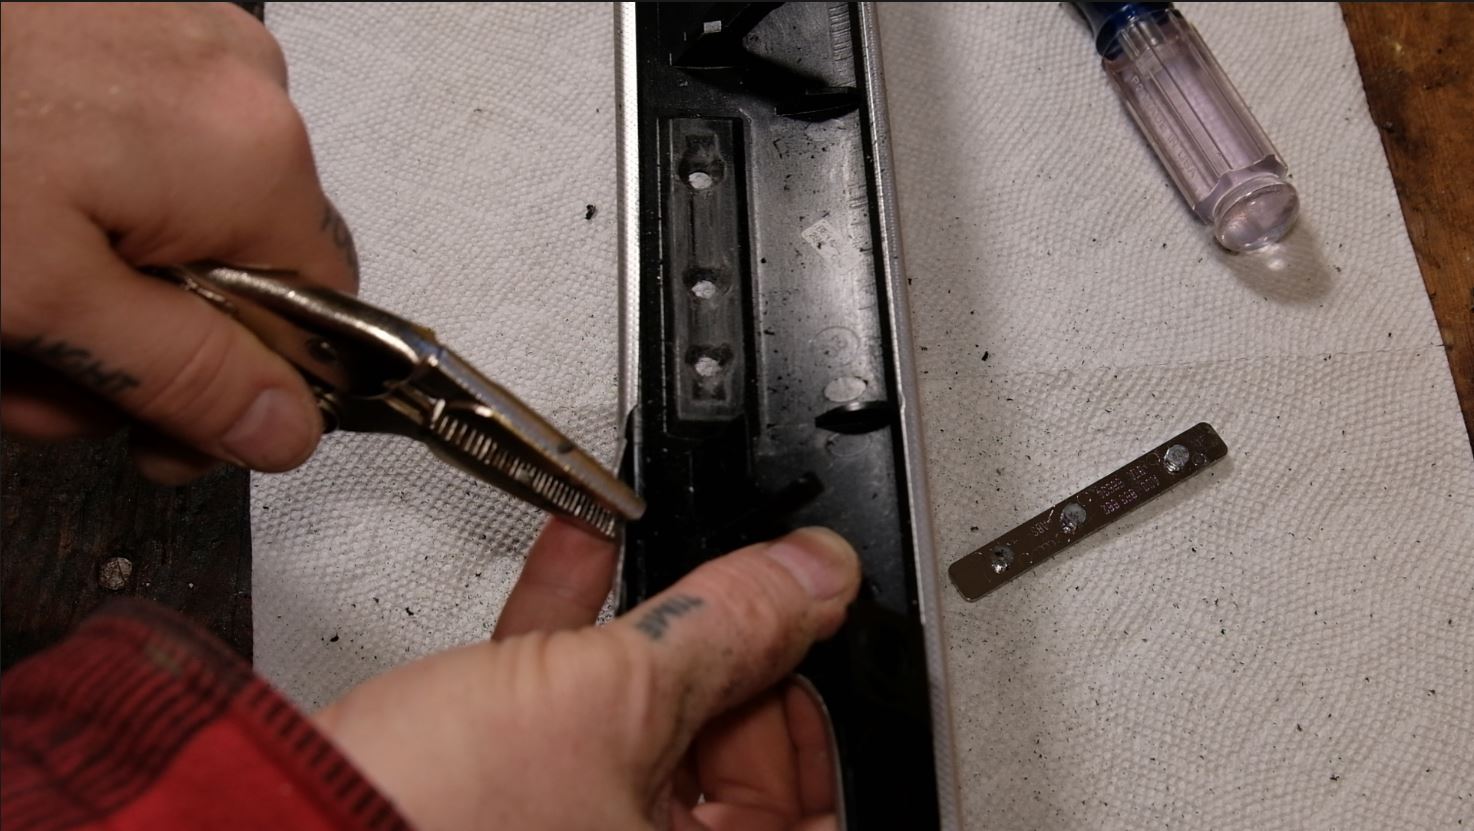
- vice grips or pliers
- JB Weld
Preparing the material
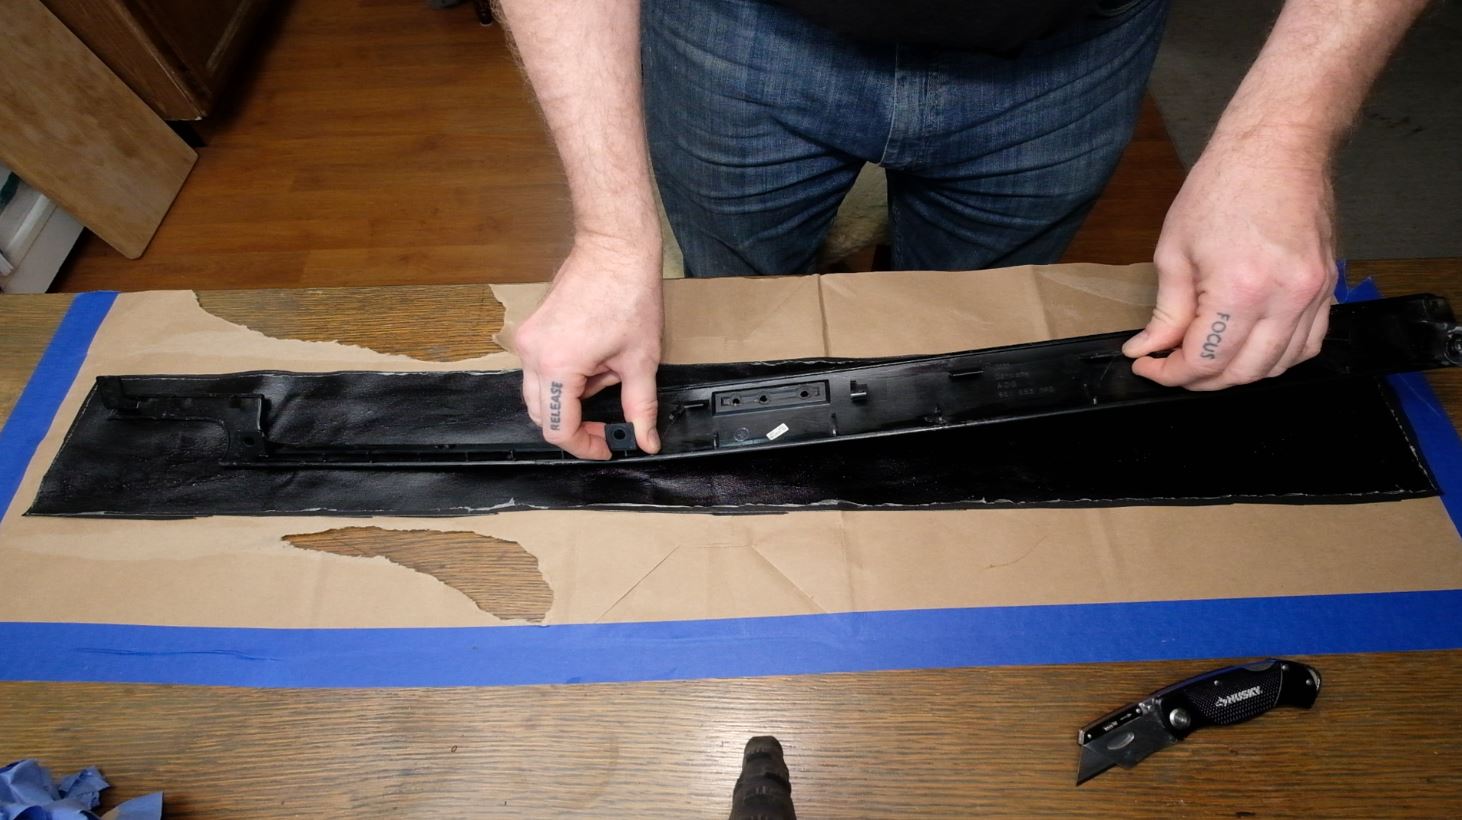
The fish scale aluminum is a very thin layer that is moulded over a plastic base piece. I did measure my trim against the other versions available. The piano black trim does not have a wrap over it and therefore the plastic is slightly larger. Same with the carbon fibre and the wood trim. This can be important because by removing the aluminum layer I made room for the suede. The aluminum is around 0.8mm thick and the suede I used was around 0.6mm.
On the rear ash tray, and the gear shift surround I did not remove the aluminum. This wasn’t a problem with the ash tray, but I noticed that the gear shift surround is now a very tight fit. This confirmed my decision to remove the aluminum on all the other parts. If you decide to wrap over say the piano black trim, be aware of the limited clearance of the parts. I would say it can be done, but the parts may be a bit snug when refitting them to the car.
Use the pliers or vice grips to unwrap the aluminum trim carefully not putting too much stress on the backing plastic. After the aluminum is off sand down all the parts with 80 or 100 grit sand paper. Making sure to sand all the way to the back sides. This gives the contact cement a rough surface to make a good mechanical bond with the plastic.
Cutting Suede
Spread the suede out on a flat surface and remove the wrinkles. Lay your part on top of the suede making sure to leave plenty around the edges. As the parts curve you want to make sure there is plenty of extra material available in case the part curves away from your cut piece of suede
Glue
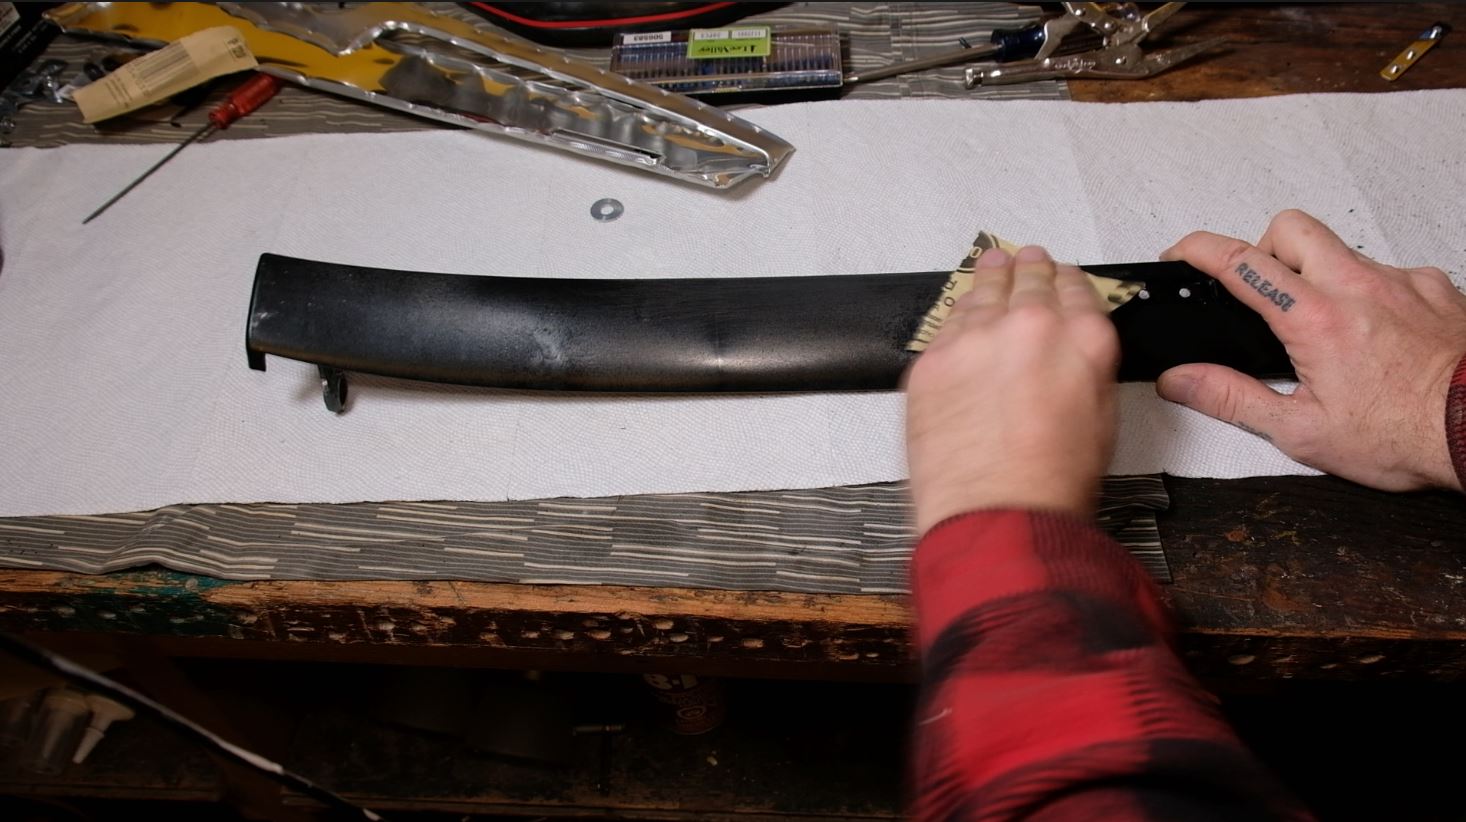
Clean the plastic with rubbing alcohol to remove any grit left over from sanding. Spread the glue evenly and liberally onto the part using a foam brush. Try not to paint over the same spot repeatedly as this will cause the glue to lump up. Set the plastic part aside to dry.

Tape the suede down to your workspace. Apply glue liberally here as well. Some glue will be absorbed into the suede so put enough on that there is some remaining to bond to the plastic. Again try not to paint over the same place repeatedly.
After both pieces have glue on them wait around 10-15 minutes for it to dry. You should be able to lay a piece of paper onto the glue and it should not stick. If the glue is still wet it will stick to the paper. The glue will not bond properly unless its dry on both pieces before putting them together.
Putting it all together
The one downside with using contact cement is that there is only once chance to get it right. You can’t peel the suede back off and try again. Well you can, but you will need a new piece of suede, and you will need to re-sand and prep the plastic. The point is apply the part to the suede is the most critical part. Its worth while to practice how you will apply the pieces together before you apply any glue.
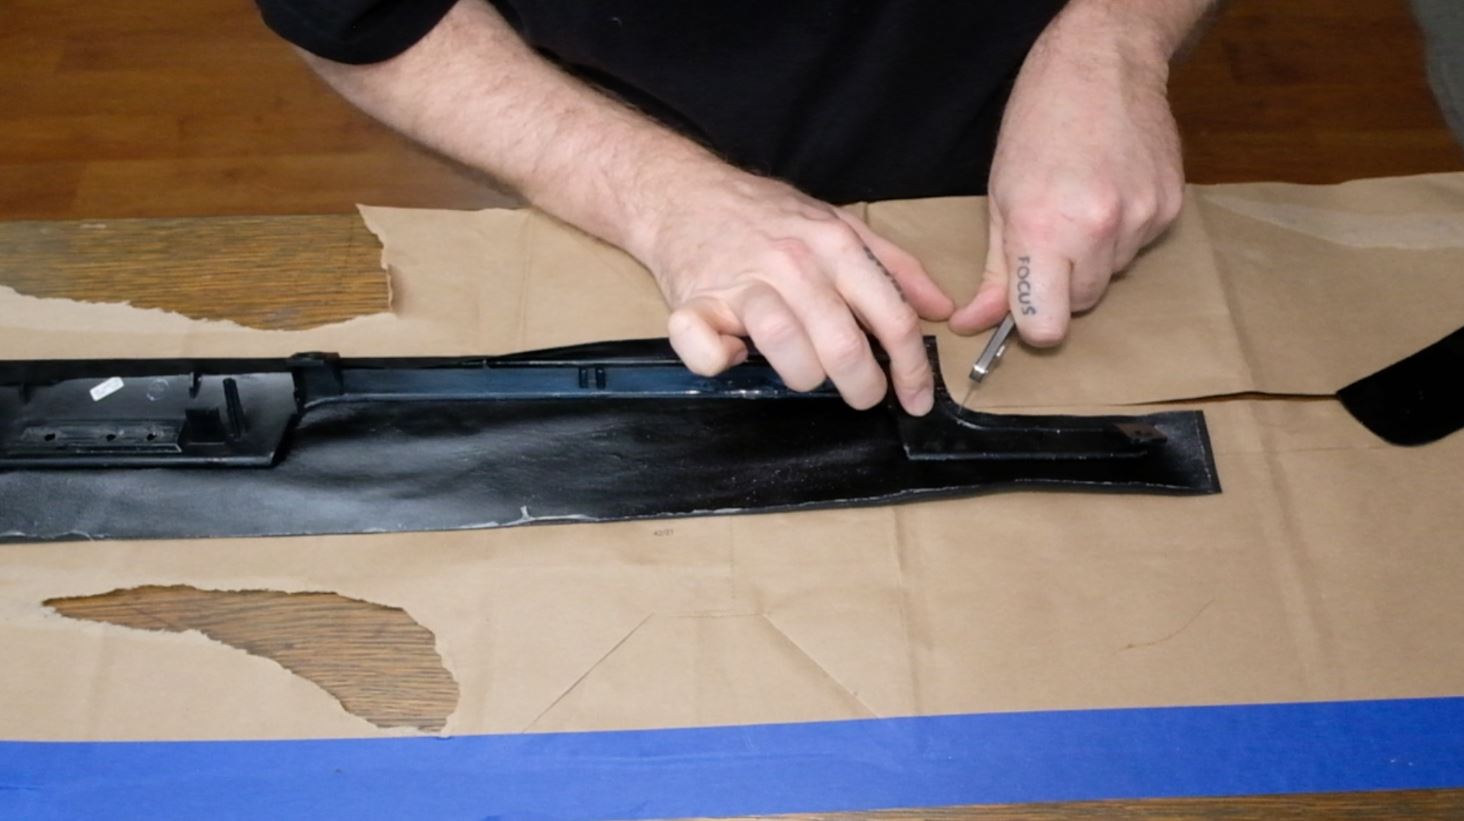
The technique I used is to put one end onto the suede then roll the piece of plastic, gently bending it. This allows the pieces to come together with the lowest chance of getting a wrinkle in the suede. Once the suede is tacked to the plastic start to gently work it around the edges. Cutting off any extra suede as you go.

Relief cuts
As you cut the suede and wrap it, cut reliefs into the suede around curves and corners. The suede naturally has some stretch to it, but some of the curves can be abrupt and cutting reliefs allows the suede to wrap around curves without wrinkling.
After the two pieces are bonded together go over the whole surface with firm pressure to ensure proper contact between the suede and the plastic.
Final Piece
The last thing to do is to glue the emblem back on. I use JB weld for this because that’s what I had available. Any epoxy glue should work.
I let the pieces sit overnight before installing them back into the car. Its probably not necessary, but I did this in winter and it was pitch black out by the time I had finished wrapping the suede.

I recommend getting a Single Ear Stepless Hose Clamp kit that includes a bunch of Ear clamps along with a tool that can be used to install new clamps and cut away old ones. Super useful as Audi uses these clamps everywhere.


Add comment