
Before you Start
Before starting this job there are a few decisions to make. Things like where to locate the gauge pod, What kind of gauge to get, and how the physical install is going to work. Where to get access to the intake manifold, and which wires to use for the electrical part of the install. This blog post will cover all these details for a 2007 Audi A4 B7. However there is a lot of general information that is relevant to any boost gauge install.
Gauge Pods
They come in all sizes shapes and mounting locations. Popular locations include the following,
- Side or Center vents
- Steering column
- A-pillar
- Ash tray
- Center of dash
- Defrost vent
Side or Center Vent
The most popular pod locations are in the center and side air vents. While these are popular my first thought is that I don’t want to give up the ability to direct air where I want it. I’ve lived in both humid and very cold climates. I realize I am a weak old white man, but when I am hot and sweaty I want to direct that nice cold AC onto me, not the general interior space. Same thing when its freezing out. I want the hot air on me to warm up, then direct it to the cabin afterwards. For this single reason I decided against these vents.
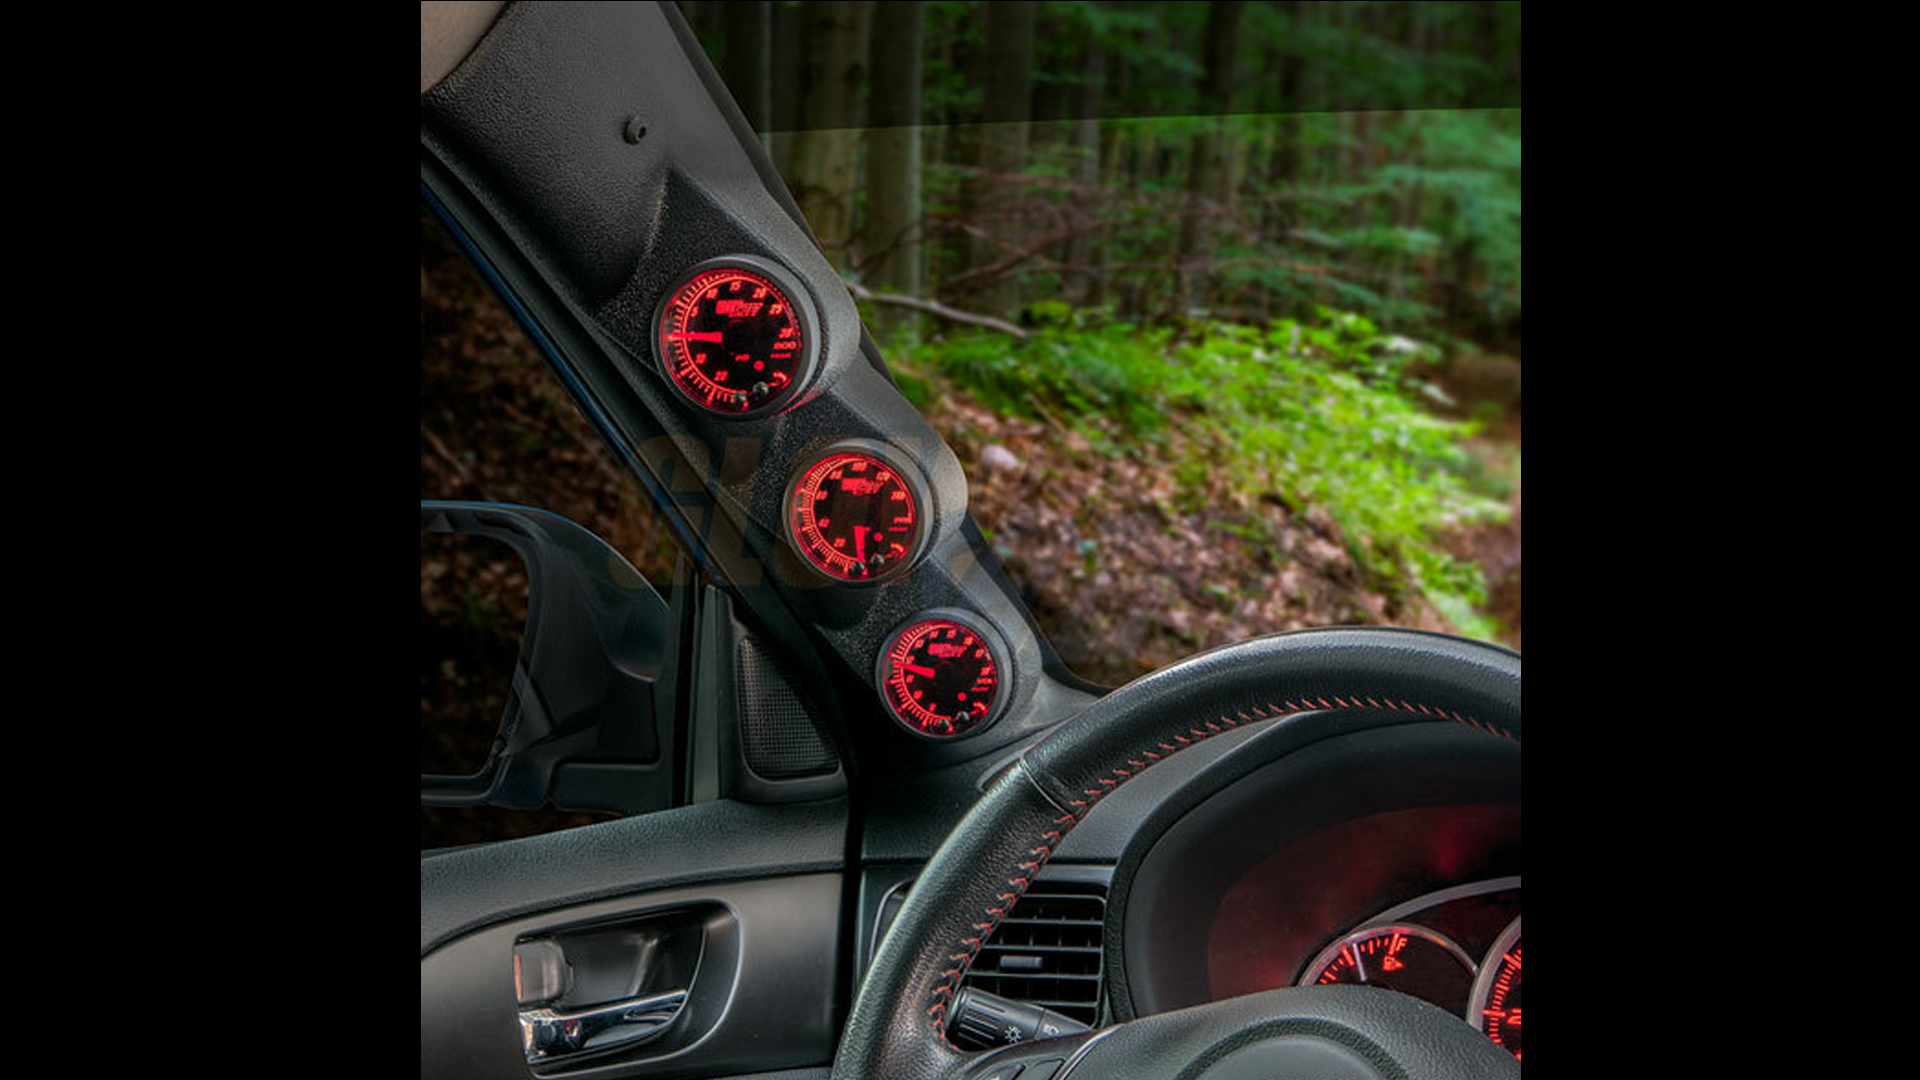
Steering Column
For the longest time I wanted to use the steering column to mount the pod. There are options for both single and dual pod mounts. The nice thing is that the gauge is located close to the other dash information. But that’s also what turned me off them. Reading feedback I learned that this style will block part of the speedometer or tachometer. And again, call me picky, but that feels like lazy design. So the steering column is out.
A-Pillar
I’ve seen a lot of really sporty looking cars with A pillar mounts. With between one and three pods for different readings. While I did research this style I could not find a version of this that used an A pillar piece that was exactly the same as the stock one. They are screwed onto the existing A pillar cover. To me this screams of a non professional install. I think they look great on race cars, and when the A pillar is designed to look stock and hold the pods. So that location was out.
Top of Dash
This is another location I dismissed. The big decider is that it’s a destructive install. Except for specific modifications I like my changes to be reversible. With no damage to the stock pieces.
Ash Tray
I have seen one custom pod mount that was located in place of the ash tray. While I respect the creativity of this location there are a few reasons I didn’t want to pursue it. The first, and biggest reason, is its way off the line of sight when driving. If I’m under hard acceleration and want to check my boost levels the last thing I want to do is move my eyes too far from the road in front of me. The second reason is I’ve already used that location to install my custom button panel.
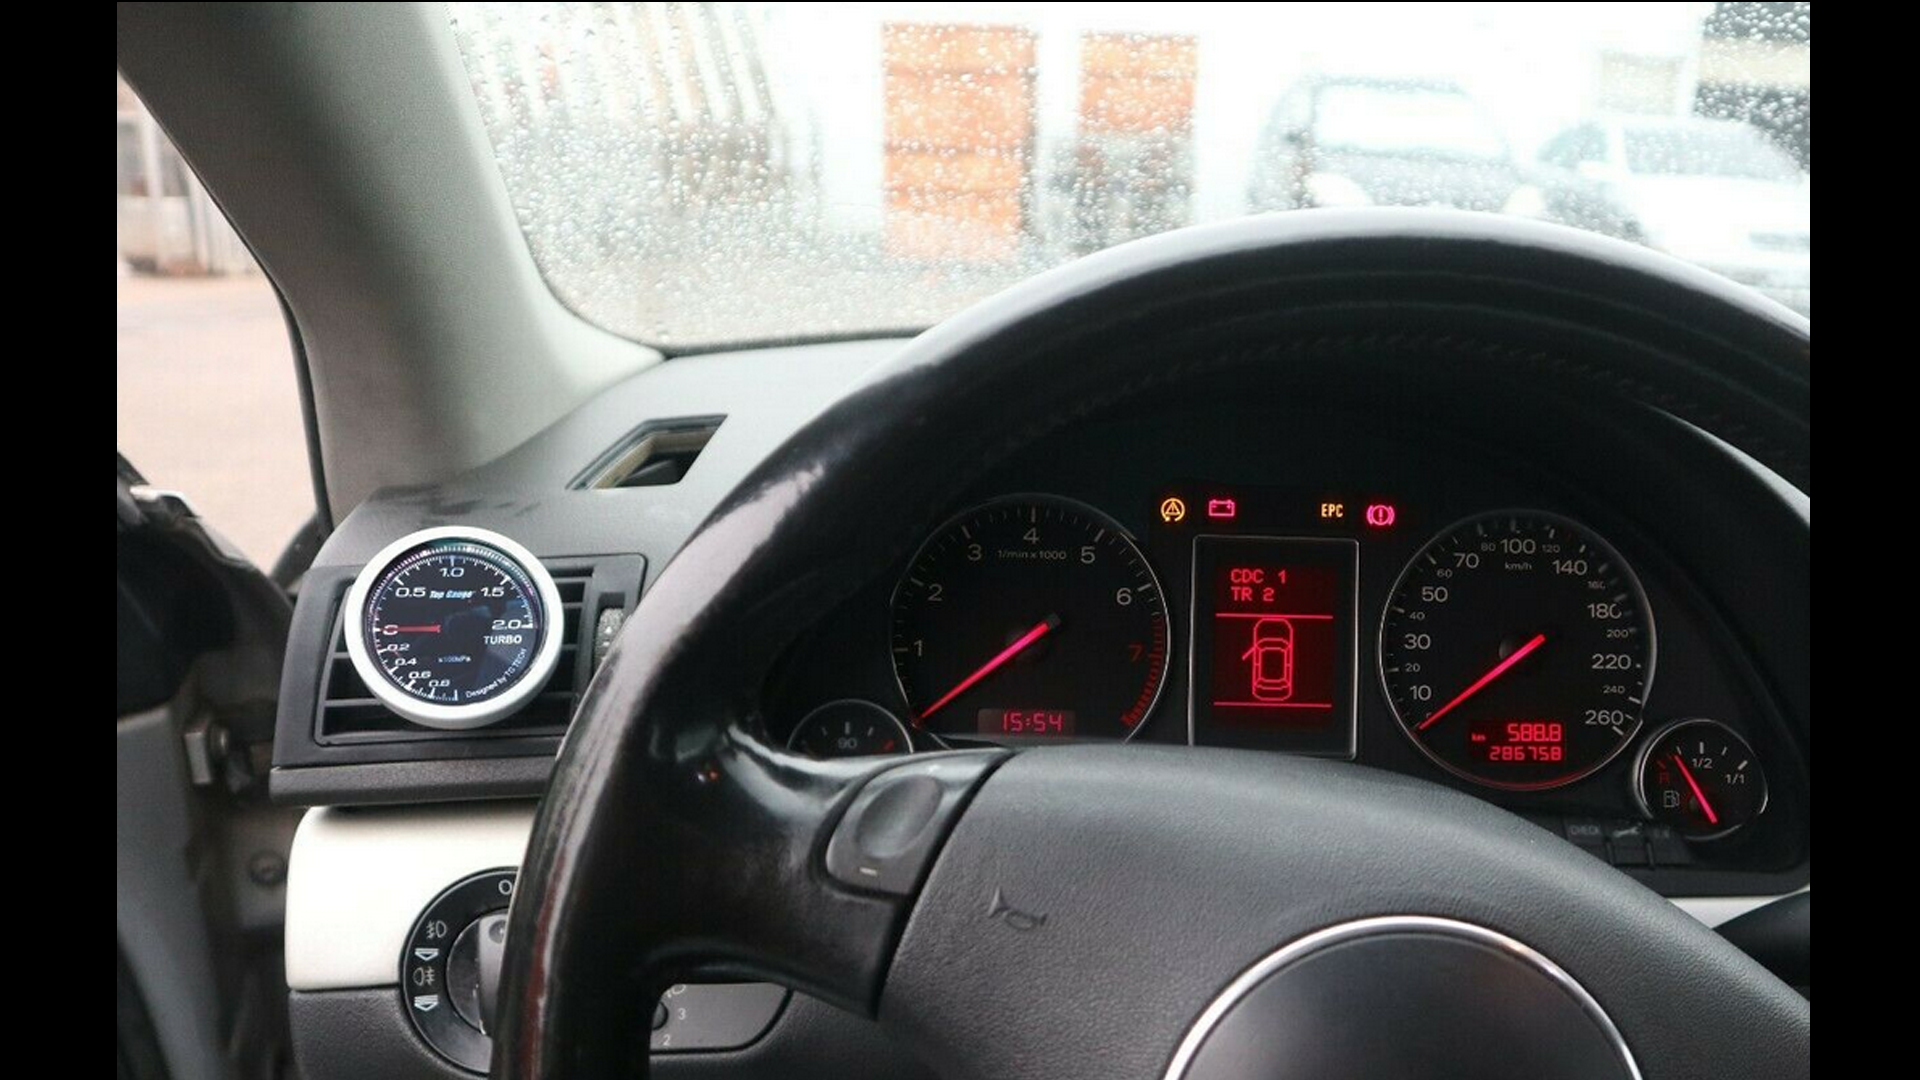
And the Winner is the Defrost Vent!!
This location took car of all the issues I have with the other locations. Its already a non adjustable vent so putting a gauge there wont affect the function of the vent. The location of the pod is also far enough out of the way that it wont restrict any air flow.
It doesn’t block any existing gauges or dials. I’m kind of OCD about this. I like to be able to read the information presented to me without having to adjust my body to get a better angle.
It’s very close to a direct line of sight when driving. I don’t have to move my eyes too far away from the road to read the gauge. That sealed the deal for me.
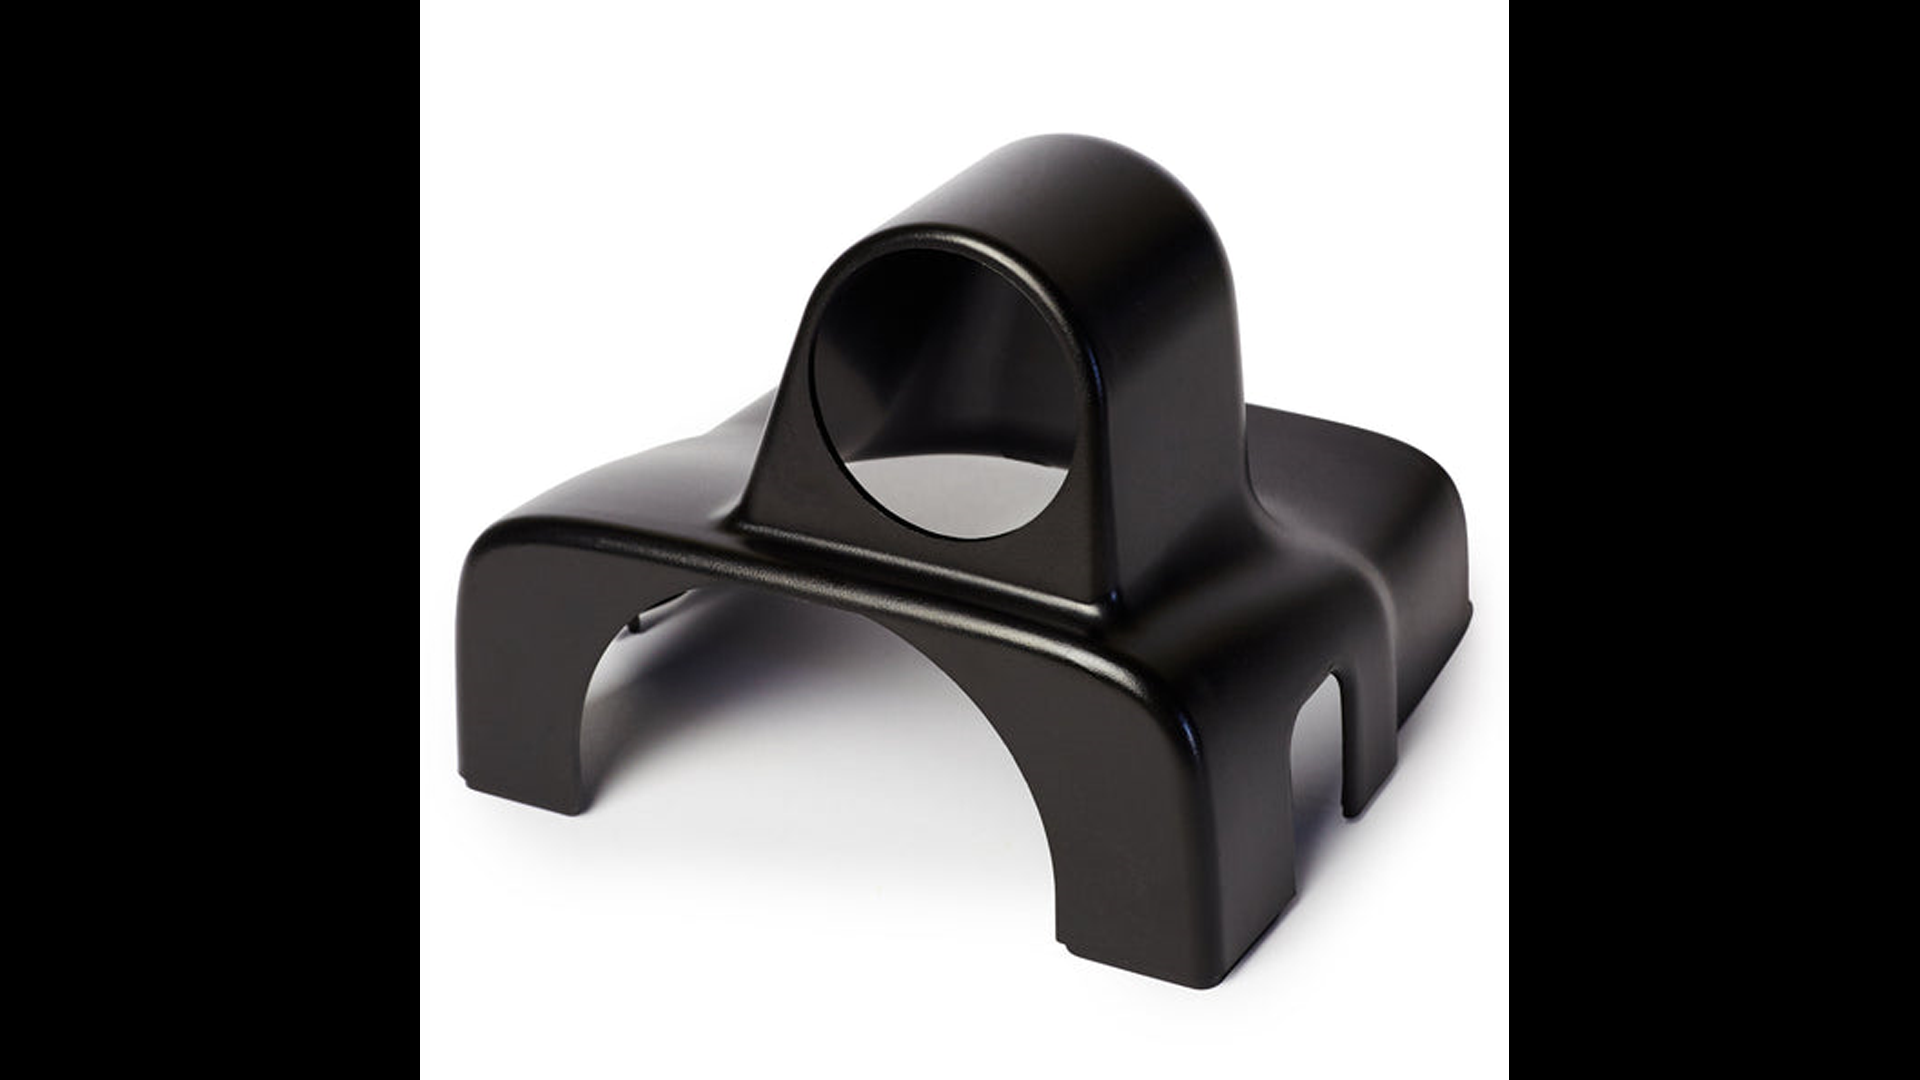
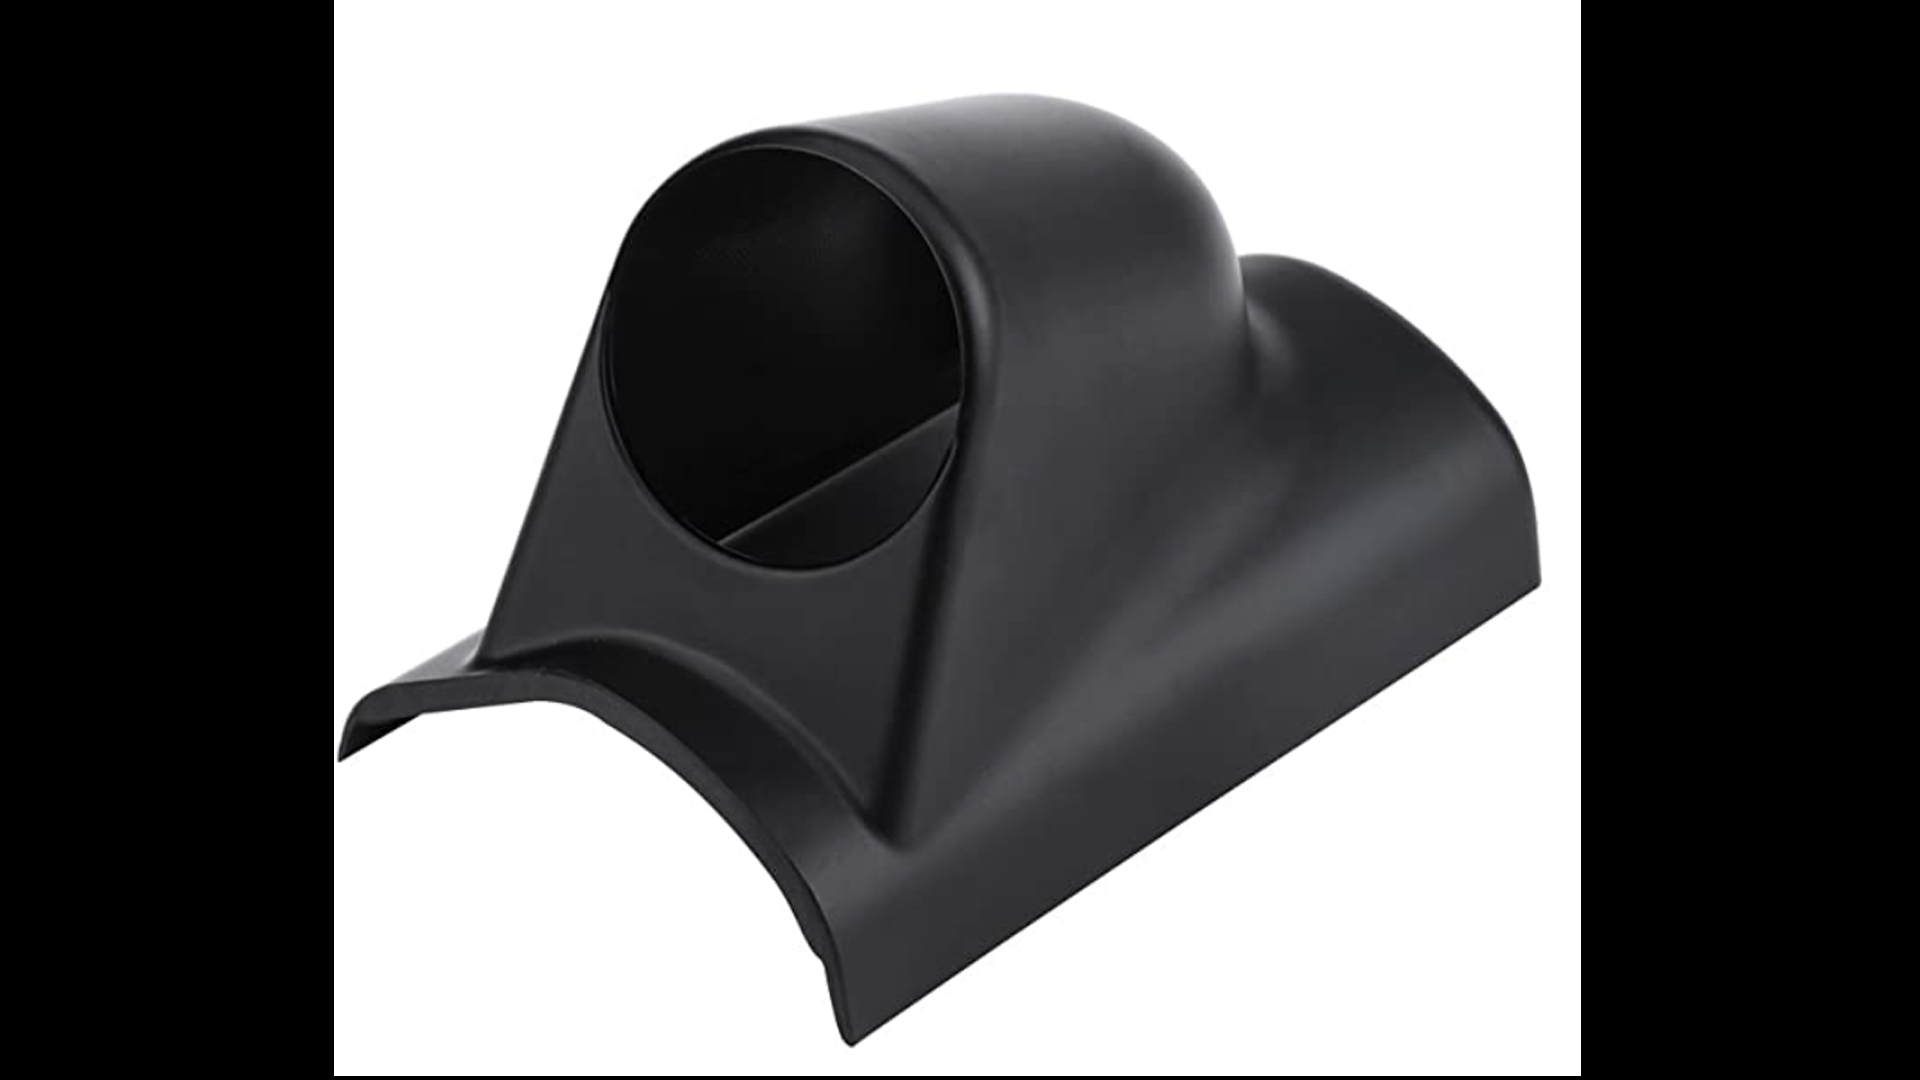
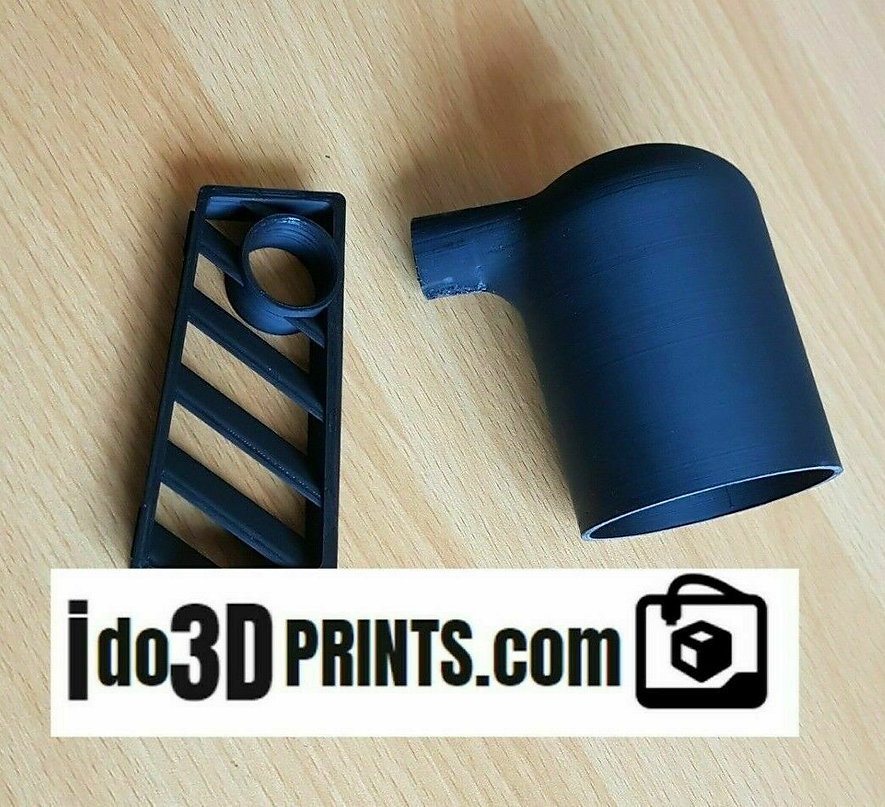
I Do 3D Prints
I found what I was looking for at I Do 3D Prints. The gauge can be bought either raw, or polished and I went for the raw version. Its a bit cheaper, and I have the materials to finish it myself. When it arrives it looks like a 3D printed item, with all the layers you would expect. But a bit of sandpaper, body filler, and flat black spray paint and it closely matches the stock colour of the dash.
Selecting a Gauge
Gauge Range
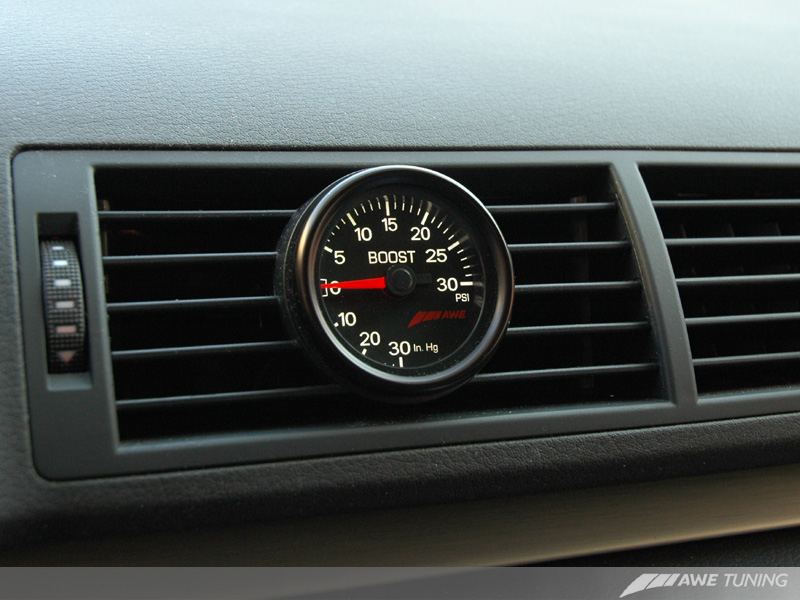
The single most important aspect of the gauge is that it is capable of displaying the range of pressures your car makes. At Idle the intake manifold is in vacuum. This is normal for every car because the cylinders keep sucking the air out of it. Vacuum is measured in Inches of Mercury or in/Hg. Researching forums I learned my car will produce anywhere between -20 and -24 in/Hg. Above atmospheric pressure Pounds per Square Inch or PSI is used to measure the pressure. Stock my car produces around 7-8 PSI.
I have a Stage 1 tune on my ECU and under the highest boost it produces 15 PSI. One day I may get a tune that allows a higher boost so I wanted a bit of head room on my gauge. So I started looking for one that was between -30 in/Hg and 30 PSI.
Gauge Face
I want my gauge to match the stock gauges as closely as I can find within a reasonable price range. My car has red dials on a black background with white numbers and a silver rim. I like the look and function of the steam gauge style. For me its more intuitive to read than a digital gauge. And I don’t want to have to think about it when quickly glancing at the gauge. I also want the gauge to point directly to the left when reading 0 or atmospheric pressure. Again it just feels more intuitive that if the needle is pointing down I’m in vacuum, and if its up I am making boost.
Gauge Style
The two basic styles of gauge are mechanical and electronic.
With a mechanical gauge the intake manifold is directly connected to the gauge with a tube. The gauge itself measures and displays the value. The advantage of a mechanical gauge is a simpler install and the main disadvantage is that they can sometimes be audible. Because the pressure is being piped right to the gauge it is possible for a rattle sound to come from the gauge as the pressure changes with each separate piston sucking in air.
Electronic gauges connect the intake manifold to a transducer that measures the value, then sends the reading electrically to the gauge display. They have the advantage of many different display options from analog to digital style, or even both at once. Some also have the functionality to connect to a boost controller. The downside is that there is more wiring required, and the need to find a suitable place to mount the transducer.
I want to keep my install as simple as possible so I’m looking for a suitable mechanical gauge. And I found one at my local auto parts store, Princess Auto. They don’t sell specific car parts, rather general vehicle stuff. Cars, trucks, trailers, combine harvesters, etc…
The gauge I found ticks all my boxes. Mechanical, similar gauge to stock, and the needle points left at atmospheric pressure.
Intake Manifold Tap Locations
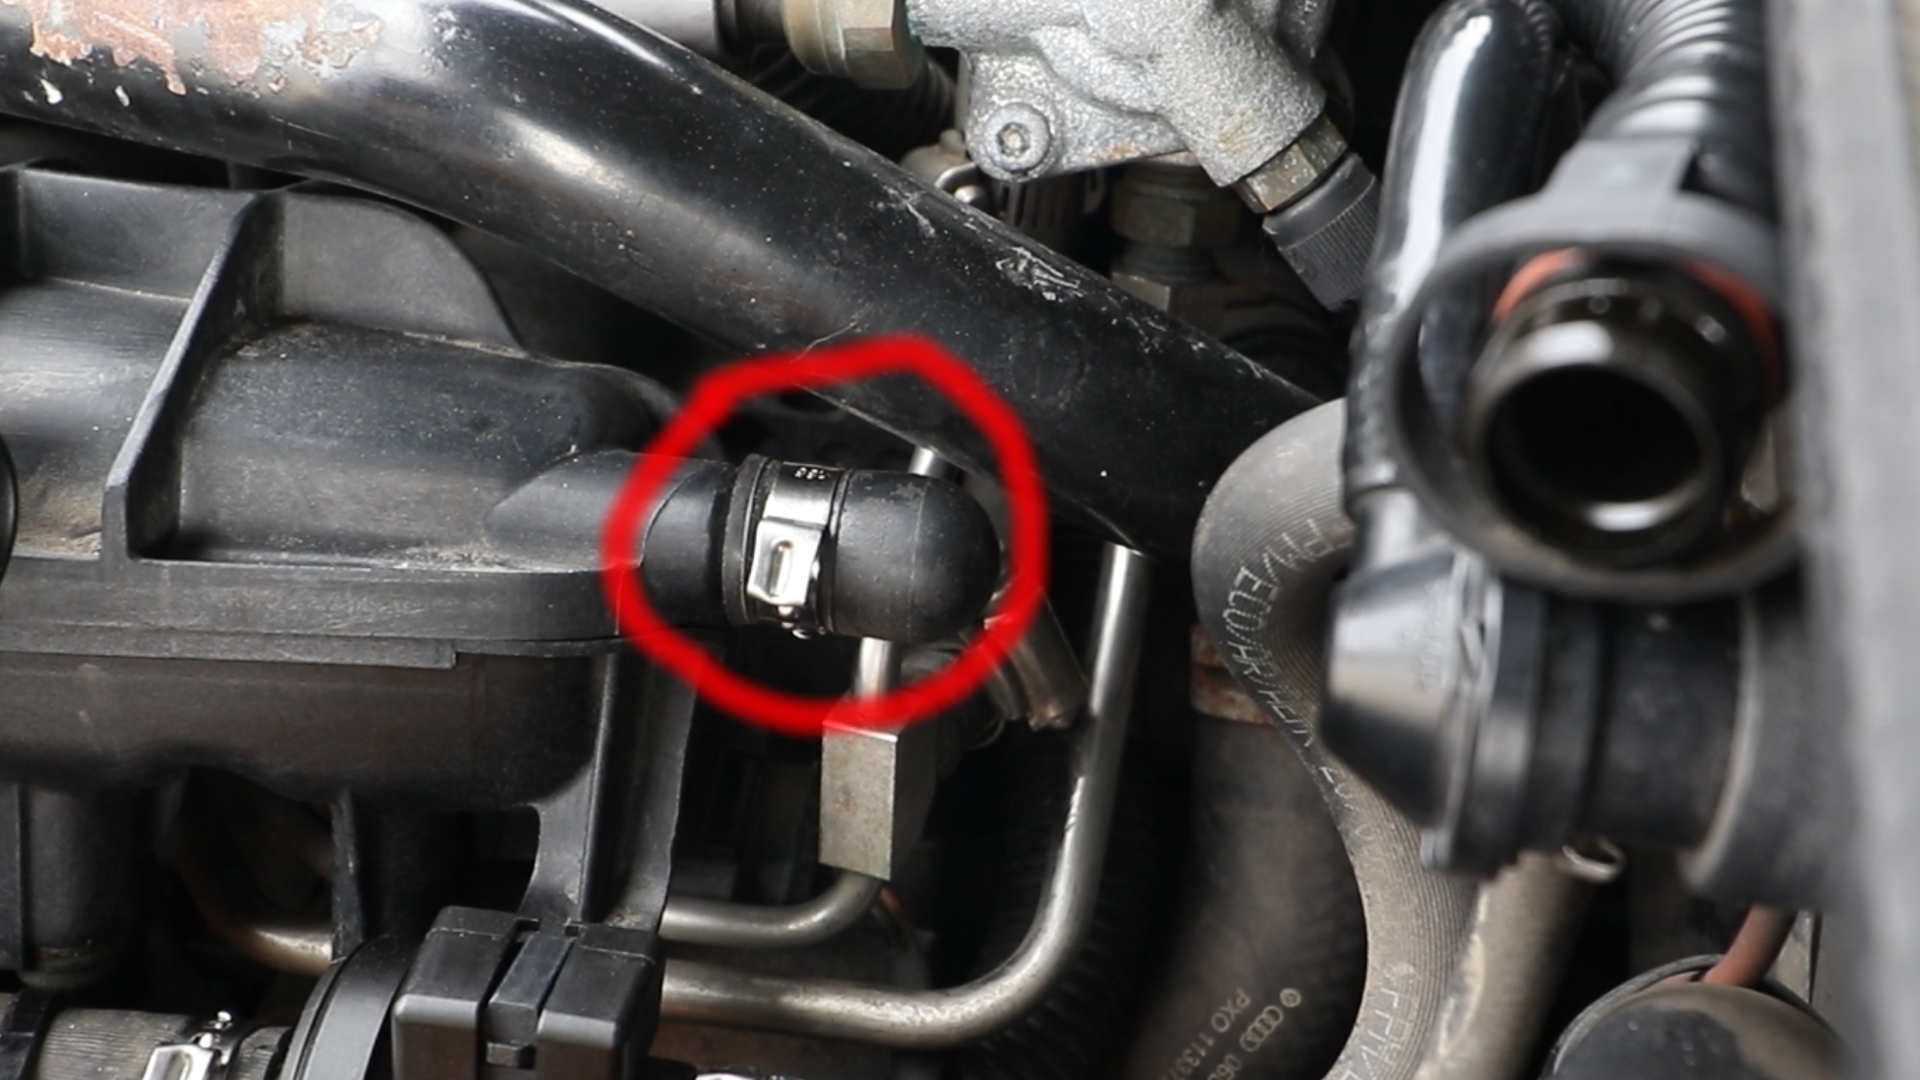
A quick search brings up many cheap options that connect between the intake manifold and the crank case breather hose. If you want to spend the money there are even expensive options of this style. the biggest flaw is they have more than one port. The spares are blocked with tiny screws. But the screws don’t have a wider head or flange. I’ve read forum posts where even screws that were installed with locktite came loose and were sucked into a cylinder and caused catastrophic engine damage. I want to avoid that.
Fortunately I found that my intake manifold has a blocked off port already from the factory. I am assuming that on a different engine model this port had a purpose. The only challenge was to make an adapter that would allow me to connect a much smaller hose to the much larger port. I used scraps of different sized hose and Single Ear Clamps to create my own adapter. It even has an extra port available for future use.

I recommend buying a Single Ear Hose Clamp kit from Amazon. The steel clips are very high quality, and it comes with a tool to both remove clips, and clamp new ones in place. Audi uses this style of clip everywhere on this car. This kit has come in handy replacing my;
- Power steering cooler hoses
- N80 purge valve on evaporator system
- Installing my turbo boost gauge
- Various other bits
Firewall Penetration
The A4 B7 has several existing ways to get through the firewall. They are located behind the glove box, in the left front wheel well, and the drivers foot well. The most direct and easy to access path is the drivers foot well. I used a metal coat hanger that I straightened out to push through the rubber grommet and into the engine compartment. The coat hanger enters the engine compartment underneath the ECU. I taped my 3mm hose to the coat hanger and pulled it through the firewall. Then I drilled a small hole between the battery are and the actual engine area. This location is the closest to where the I am mounting the gauge so I zip tied the hose to existing wiring under the steering wheel.
Electrical Install
While the gauge I selected is manual, it has a frosted plastic cover on the front and uses LED back lighting to make the gauge visible. A basic install needs only a ground connection and a connection to a switched 12v source. My gauge came with a third wire that can be connected to the headlight wire which will slightly dim the switch when the headlights are turned on. This should make the gauge less bright for night time driving.
The ground and switched 12v source are simple. I used a fuse tap on fuse slot 31 for switched voltage. And just above the fuse box is an existing bolt that can be used for chassis ground. The harder part is finding a wire that is energized when the headlights are on. Forums initially told me that pin 17, labelled 58d would work. And it does… kind of. It is energized when the headlights turn on. However it is used to control the brightness of the dashboard back light. To do this it uses a Pulse Width Modulated signal at 240 Hz. By adjusting the duty cycle of the 12V PWM it effectively adjusts the voltage being sent to the dashboard back lights between 4 and 12 Volts. So if the dash back light is bright it works great. As the back lighting dims the gauge starts to flicker when the voltage becomes marginal.
So, I took it upon myself to pin out every pin on the back of
the headlight switch. I also did this test under various modes. With the key out of the car, the key in accessory position, the car running, and the car running in daytime with the outdoor light sensor covered to simulate evening. Also with the DRL on and OFF. I spend a few hours doing this work. Then because I am ADHD and thought I had messed it up I did it all over again. Below is the result of my labour. A nice spreadsheet that shows what every wire on the connector is used for. You’re welcome.
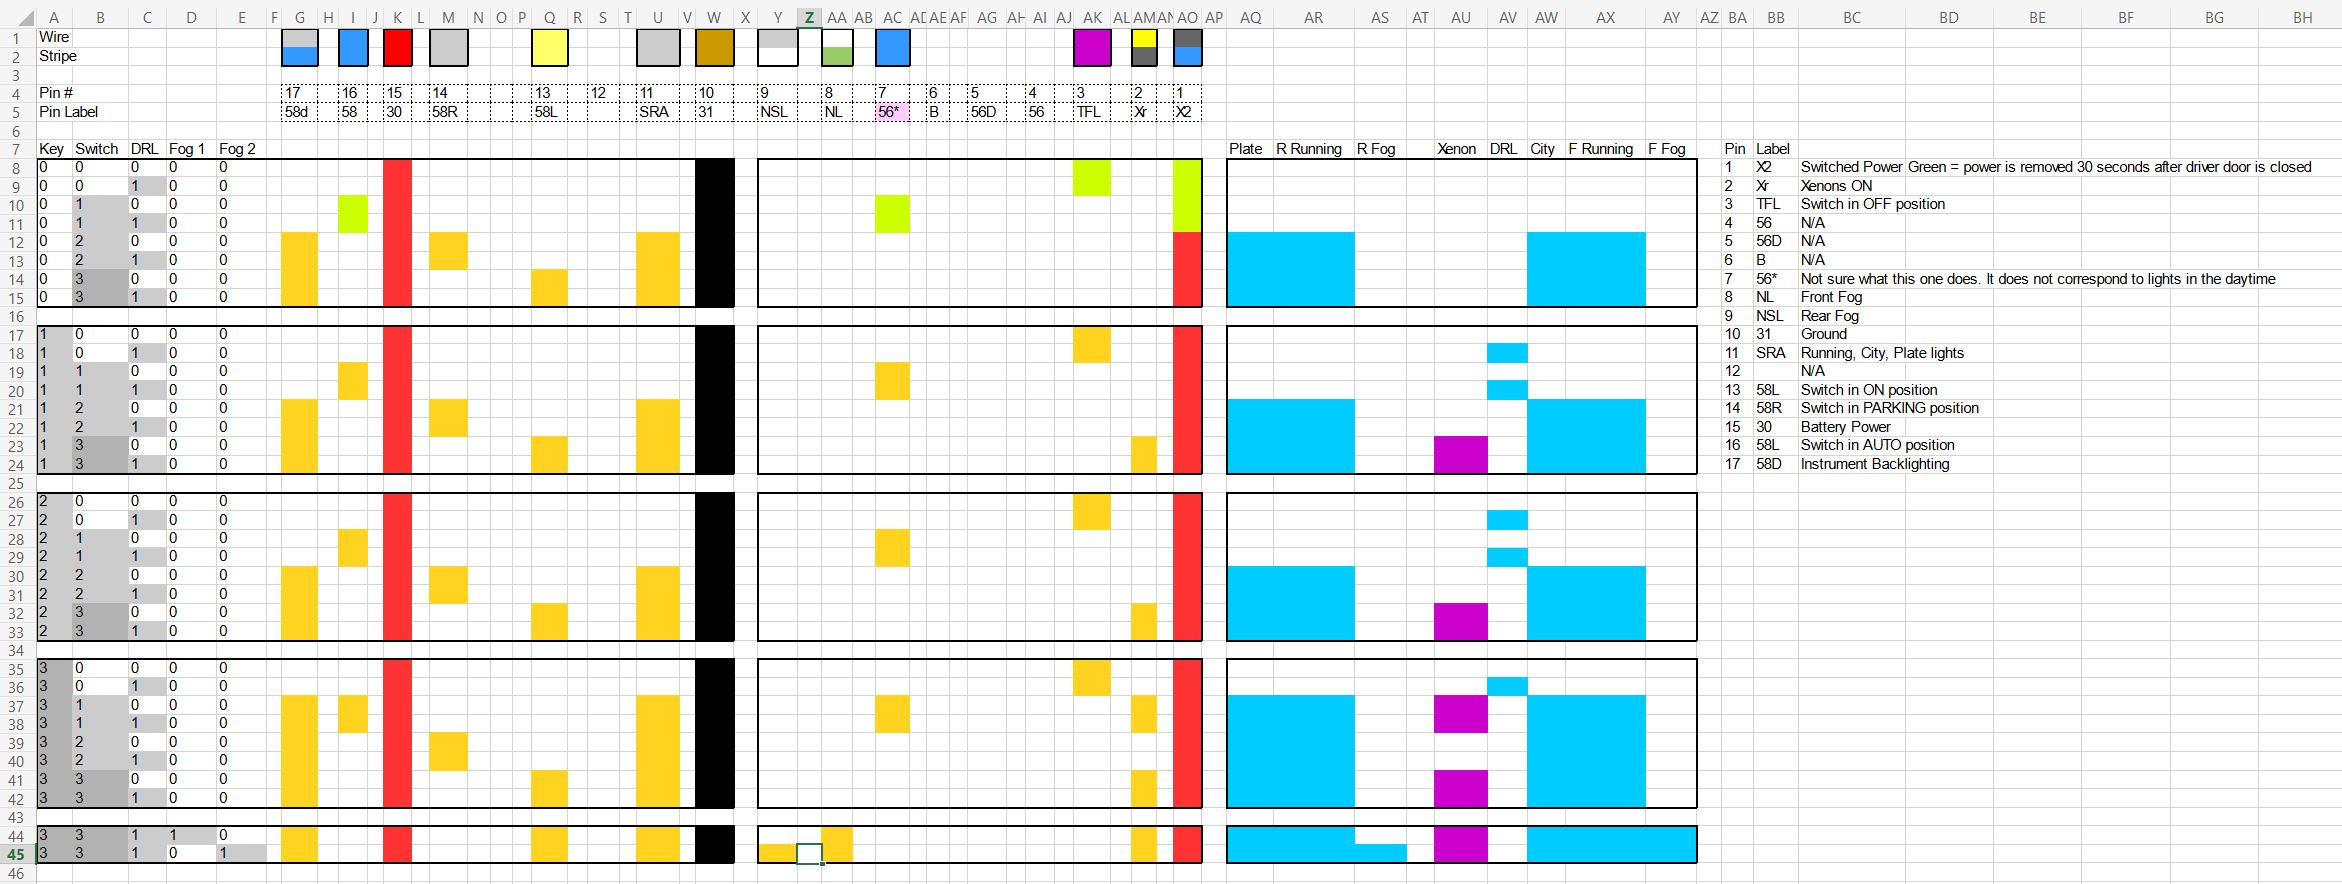
A Better Way
If all you want is a cleaner way to make the connections without using a fuse tap use the following pins
| Pin | Label | Function | Wire Colour |
| 1 | X2 | Switched Power | Black with Blue stripe |
| 2 | Xr | Headlight | Yellow with Grey stripe |
| 10 | 31 | Ground | Brown |
Keep in mind this pin out is specific to my car. I have no idea what other models may have. If you have a 2007 A4 B7 with Xenon headlights and an Auto position on the light switch then its likely yours is the same. Also check that all wire colours are the same. Below is a table with the entire pin out.
Gauge Install
Remove the defrost vent with a trim tool. Be careful the dash is easily damaged by nasty metal screw drivers. To run the wires up to the defrost vent its necessary to remove the side air vent. Give it a bit of a wiggle while pulling straight out. Careful when removing it, there are wires attached for the vent dial back light.
Create a two holes in the side air vent. One on top and one on bottom. Just big enough for the wires and air hose. Its a tight spot to get a drill into so I used a Dremel tool with a grinding bit. Went through the plastic like butter.
Run the wires up through the holes, out the defrost vent. Pass the wires through the new defrost vent, and through the pod. Cut the air line to length. I cut my air line a bit long as the extra can be pulled back under the dash. Plug everything in and push the gauge into the pod. Adjust the pod so the gauge faces your face in your normal driving position.
Easy Peasy…
Conclusion
The Pros
It works freaking great! And it confirmed that my Turbo was toast. when the engine was cold the turbo was able to create good boost, but after getting to operating temperature it would only make a maximum of 3 PSI. So I bought and installed a new turbo, and now it will put out the max of 15 PSI. The gauge is responsive.
It doesn’t have a huge logo on the face. Just a tastefully sized label of “Boost”.
The Cons
Occasionally there is a slight rattle from the air pressure against the diaphragm of the gauge. I really have to try to hear it though. Under normal driving conditions its quiet enough that it never grabs my attention.
The smoked plastic cover of the gauge is convex and highly reflective. Even in daytime the reflections can be bright enough to obscure parts of the dial.
The next Con is a huge one. The back light SUCKS. It does work, but it work too good. Even in bright sunlight the gauge is too bright. And the dimming option is so minimal as to be useless. So the gauge is even brighter at night. My immediate solution is a 200 Ohm resistor in line with the 12V power. This has dimmed the LED enough to make night driving acceptable, but now the LED is too dim in the daytime.
However I have a couple solutions in mind. One relatively simple needing only a 12v relay with NO and NC contacts and a couple resistors, and a far more complex solution that required me to hack into the CANbus network using an Adafruit Feather micro-controller and intercept the data packet that is used to adjust the back lighting. Stay tuned for that blog post, Its sure to be a nail biter.


Add comment